
Building a backyard obstacle course for your family can be one of the most fulfilling—and fun—projects you’ll ever take on as a parent. I recently decided to surprise my kids with one, and let me tell you, it was a hit! Not only did it get everyone outside, but it also sparked creativity, helped burn off energy, and created a bonding activity for the whole family.
If you’re thinking about building your own backyard obstacle course, let me walk you through the process. I’ll share what worked for me, provide tips, and include a list of ideas to customize it for your space and family. It’s easier than you think, and you don’t need to be a DIY expert to pull it off!
Why Build a Backyard Obstacle Course?
- Encourages Active Play: In a world full of screens, this is a great way to get your kids moving.
- Creative Outlet: Designing the course lets you and your kids flex your creative muscles.
- Family Bonding: It's not just about building the course—competing and laughing together is the real fun.
- Customizable for Any Space: Whether you have a large yard or a small one, you can adapt the course to fit your needs.
- Inexpensive Fun: You can create most of the elements with things you already have around the house.
Getting Started: Planning Your Obstacle Course
Before diving in, I spent a bit of time planning. Here’s what I considered:
- Know Your Space: Take a good look at your backyard. Is it flat or hilly? Do you have grass, dirt, or concrete? Identify the areas you want to use safely.
- Age of Participants: My kids are different ages, so I made sure the obstacles could be scaled up or down in difficulty depending on who was playing.
- Safety First: Think about potential hazards. Avoid obstacles near sharp objects, hard surfaces, or areas with poor footing.
- Set a Theme (Optional): I opted for a jungle adventure theme, complete with vines (ropes) and “quicksand” (a tarp with water and soap). Themes can make it more exciting for younger kids.
Materials You’ll Need
You don’t have to spend a fortune to make this happen. I scavenged my garage, repurposed old toys, and bought just a few items. Here’s a list to get you started:
- Ropes: For climbing, swinging, or creating boundaries.
- Hula Hoops: Used for jumping in and out or as targets.
- Buckets and Cones: Great for marking start and finish lines or creating weaving obstacles.
- Wooden Planks or Boards: Perfect for balance beams.
- Old Tires: If you can find some, they work great for stepping or crawling through.
- Pool Noodles: Flexible, lightweight, and versatile for running or jumping obstacles.
- Chairs or Tables: For crawling underneath or creating tunnels.
- Tarps: Use them for slip-and-slide areas or as barriers.
- Household Items: Things like laundry baskets, pillows, and cardboard boxes can all be repurposed into fun obstacles.
Building the Course: Step-by-Step
Here’s exactly how I built my obstacle course and the elements I included:
1. Start with a Warm-Up Station
- I set up a simple jump rope station near the starting line to get everyone warmed up.
- Other ideas: hula hoop spins, jumping jacks, or a quick sprint to the next obstacle.
2. Set Up a Balance Beam
- I used an old wooden plank, placed on two bricks to elevate it slightly. It was sturdy but low enough that I didn’tworry about falls.
- Alternatives: Use a long piece of tape on the ground for a flat balance line or lay down a pool noodle for a wobblier version.
3. Create a Tire Run
- I found two old tires and laid them flat for a simple run-through challenge. The kids had to step in and out of the tires without touching the edges.
- You don’t have tires? Tape circles onto the ground or draw them with sidewalk chalk.
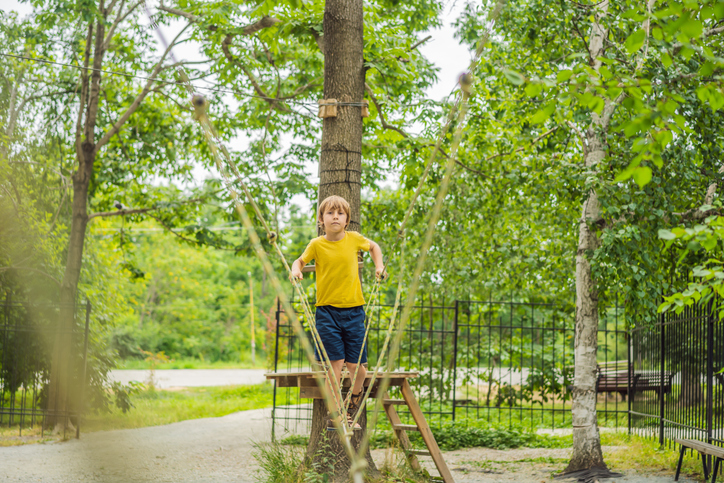
4. Swing Across “Quicksand”
- I tied a sturdy rope to a tree branch, and below it, I created a “quicksand” pit using a tarp filled with soapy water. The goal was to swing across without falling in!
- Tip: If you don’t have a tree, use a sturdy pole or skip the swing and have them jump over the area instead.
5. Crawl Under the “Tunnel”
- I placed two chairs side by side with a blanket draped over the top to create a tunnel. The kids had to army crawl underneath it.
- You could also use cardboard boxes, pool noodles bent into arches, or even a low garden trellis.
6. Obstacle Weave
- I set up cones (you can also use buckets or even empty soda bottles) in a zigzag pattern and had the kids weave through them.
- To make it trickier, I had them carry a ball while weaving.
7. Jump Over Hurdles
- Using pool noodles propped up on buckets, I created low hurdles for the kids to jump over.
- For older kids, you can raise the height by stacking items under the noodles.
8. Target Practice
- I stood up a few laundry baskets and gave the kids bean bags to toss into them. Each basket had a different point value depending on how far away it was.
- No bean bags? Use rolled-up socks, small balls, or even crumpled paper.
9. Cool Down with a Water Obstacle
- My finale was a slip-and-slide using a tarp, water, and a bit of soap. The kids had to slide to the finish line!
- If water isn't an option, use a simple sprint or have them do a silly dance to finish the course.
Adding Extra Fun
- Timers: I timed each kid to see who could finish the fastest. It added a bit of competition but kept it lighthearted.
- Obstacle Variations: After a couple of rounds, I switched up the order or added new rules, like hopping on one foot through certain sections.
- Parent Participation: My kids loved it when I ran the course too. Spoiler: I was nowhere near as fast as they were.
Lessons Learned
- Trial Runs Are Key: I ran through the course myself to make sure everything felt safe and doable. A few tweaks made a big difference.
- Keep It Flexible: Kids are creative. They started coming up with their own rules and ideas for the obstacles, which made it even more fun.
- Don’t Overthink It: The course doesn’t have to be perfect. Some of the simplest obstacles were the most entertaining.
- Watch Out for Mud: If you’re adding water elements, expect muddy footprints everywhere. Totally worth it, though!
Why It Was Worth It
Seeing my kids’ faces light up as they ran through the course was priceless. They laughed, cheered each other on, and got a great workout without even realizing it. It turned into a neighborhood hit too—their friends came over to try it out, and soon, we had a mini backyard Olympics going on.
Beyond the fun, this project reminded me how something as simple as a backyard obstacle course can create lasting memories. It’s not about spending a ton of money or creating something Pinterest-perfect. It’s about the joy of building something with your hands and watching your family enjoy it together.
So, what are you waiting for? Go raid your garage, sketch some ideas, and start building. The only rule: have fun!